
RV Sewer Hose Connection Nightmares: Solved.
Introduction
Let’s be honest, nobody buys an RV dreaming about handling the sewer hose. We envision scenic sunsets, crackling campfires, and the open road. But the reality of RV life includes the less glamorous, yet essential, task of emptying your holding tanks. And that’s where the potential for “sewer hose connection nightmares” lurks.
We’ve all heard the horror stories – or worse, experienced them firsthand. The dreaded “brown shower” from a leaky connection, the frustrating struggle to get a secure fit, or the lingering odor that seems to permeate everything. These aren’t just minor inconveniences; they can quickly turn a dream vacation into a smelly, stressful ordeal.
Explanation of the Problem
Think about it: a faulty sewer hose connection isn’t just a temporary mess. In the short term, you’re dealing with unpleasant smells, potential spills, and the immediate frustration of cleaning up a biohazard situation. This can disrupt your travel plans, ruin your campground experience, and even lead to arguments within the RV.
But the long-term consequences can be even more significant. Repeated leaks can damage your RV’s plumbing system, leading to costly repairs down the line. A poorly maintained sewer system can also attract pests, create unsanitary conditions, and even pose health risks to you and your fellow campers. Let’s not forget the potential for environmental contamination if spills aren’t properly contained. Plus, a bad experience can sour your overall RVing enjoyment, making you less likely to hit the road again.
So, what can you do to avoid these “nightmares” and keep your RV trips flowing smoothly? The good news is, with a little knowledge and the right equipment, you can master the art of the sewer hose connection and reclaim your RVing bliss. Let’s dive into some practical solutions.
Solutions
Here are several approaches, from simple fixes to more mahjong288 robust solutions, to help you banish those sewer hose nightmares forever:
- The Foundation: Investing in Quality Equipment
- The Right Hose:Your sewer hose is the first line of defense. Don’t skimp on quality here. Opt for a heavy-duty, reinforced hose with reliable fittings. Look for hoses with UV protection to prevent cracking and degradation from the sun. Avoid the cheap, flimsy hoses – they’re more prone to leaks and punctures.
- Example:The Camco RhinoFlex is a popular choice known for its durability and ease of use. It’s a worthwhile investment that can save you headaches in the long run.
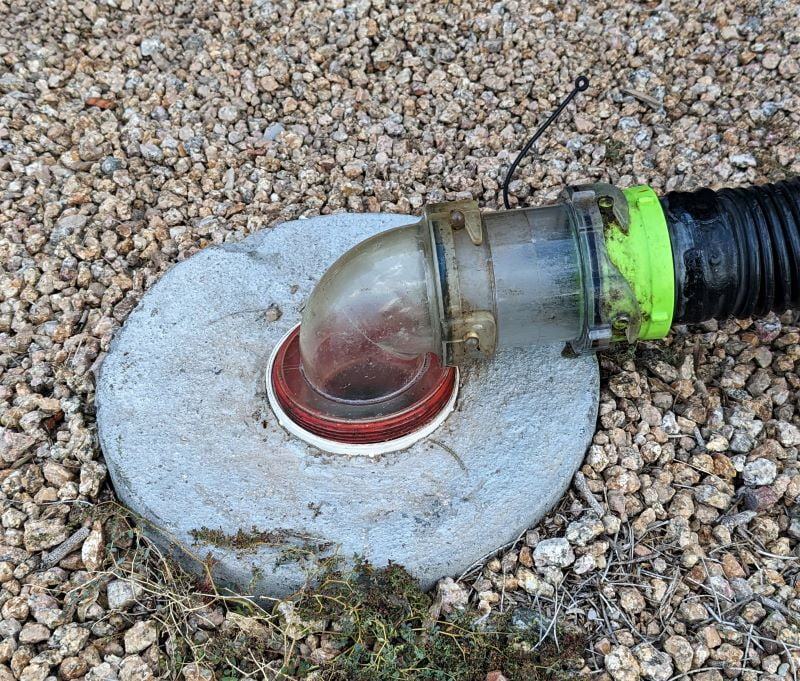
- Secure Fittings:Ensure your hose fittings are compatible with both your RV’s outlet and the dump station inlet. Look for fittings that create a tight, secure seal. Consider clear elbow fittings that allow you to visually inspect the flow during dumping – it’s a surprisingly satisfying way to know you’re doing it right!
- Hose Support:Don’t underestimate the importance of a good hose support. This keeps your hose elevated, promoting better drainage and preventing kinking or damage.
- Example:Several options are available, from simple plastic stands to adjustable, foldable supports. Choose one that suits your needs and the terrain of your campsites.
- The Right Hose:Your sewer hose is the first line of defense. Don’t skimp on quality here. Opt for a heavy-duty, reinforced hose with reliable fittings. Look for hoses with UV protection to prevent cracking and degradation from the sun. Avoid the cheap, flimsy hoses – they’re more prone to leaks and punctures.
- Mastering the Connection Technique:
- Preparation is Key:Before you even open your sewer compartment, gather your supplies: gloves, a hose connector, a bucket (for catching drips), and a disinfectant spray. This proactive approach minimizes the chance of a messy surprise.
- The Right Angle:Ensure the hose is properly positioned and angled downhill to facilitate drainage. Gravity is your friend! If the dump station inlet is higher than your RV outlet, you may need to use a portable RV macerator pump to assist the flow.
- Secure the Connection:Connect the hose to your RV’s outlet first, ensuring a tight seal. Then, carefully connect the other end to the dump station inlet. Use a threaded connector or a secure clamp to prevent accidental disconnections.
- The Water Test:After making the connection, run a small amount of water into your black tank and check for leaks at both connections. This simple test can save you from a major mess later on.
- Preventing Clogs and Backups:
- The Importance of the Black Tank Flush:Most RVs come equipped with a black tank flush system. Use it regularly to prevent solid waste buildup and ensure thorough cleaning.
- Avoid Overfilling:Don’t let your tanks get completely full. This can put undue pressure on the plumbing system and increase the risk of leaks.
- The Right Toilet Paper:Use RV-specific toilet paper that is designed to break down quickly in the holding tanks. Avoid using regular toilet paper, as it can clog the system.
- Consider Tank Additives:Numerous tank additives on the market can help break down waste, control odors, and keep your tanks clean. Research different options and choose one that suits your needs.
- Alternative Solutions: Beyond the Traditional Hose
- Macerator Pumps:For those who frequently camp in locations with challenging dump station setups, a macerator pump can be a lifesaver. These pumps grind up solid waste and pump it through a standard garden hose, allowing you to dump your tanks into a toilet or other suitable drain.
- Portable Waste Tanks:If you’re boondocking or camping in a location without a dump station, a portable waste tank can be a convenient solution. You can empty your holding tanks into the portable tank and then transport it to a dump station at your convenience.
Case Study: From Frustration to Flow
Let’s consider the case of Sarah, a weekend RVer who dreaded the dumping process. She consistently struggled with leaks and unpleasant odors. Frustrated, she almost gave up on RVing altogether.
However, after upgrading to a high-quality sewer hose with secure fittings, mastering the connection technique, and incorporating a black tank flush routine, Sarah’s experience dramatically improved. She now confidently manages the dumping process and enjoys her RV trips without the stress of potential sewer hose nightmares.
Conclusion
RV sewer hose connection nightmares are a common problem, but they don’t have to be a permanent fixture in your RVing adventures. By investing in quality equipment, mastering the connection technique, and implementing preventative measures, you can conquer these challenges and reclaim your RVing freedom.
Take action today. Inspect your current sewer hose setup, identify any potential weak points, and upgrade where necessary. Implement the tips and solutions outlined in this article, and you’ll be well on your way to a cleaner, more enjoyable RVing experience.
Don’t let the fear of a messy situation hold you back from exploring the open road. Embrace the challenges, learn from your experiences, and equip yourself with the knowledge and tools you need to succeed. With a little preparation and the right approach, you can transform your sewer hose connection from a nightmare into a routine task, allowing you to focus on what truly matters: creating unforgettable memories on the road. Now go out there and make some memories – odor-free!
“`